Compatibility
Please check your Windows Operating System for compatability with the below chart -
NOTE:
If your Operating System does not appear in the chart below then it is not compatible with GlobalProtect and you will need to update your current Operating System.
If your computer is running an ARM64 based processor and Windows, you must install Global Protect client from the Microsoft Store.
To find out if you have an ARM64 chip, go to Settings > System > About on Windows, and look at the "System type" under "Device specifications." It will say either "ARM-based processor" (you have ARM64) or "x64-based processor" (you have x86-64).

For a more indepth and up to date assessment of compatibilty, please go to GlobalProtect
Installing GlobalProtect VPN Client
VIU-Issued Computer
Your VIU-issued computer may already have GlobalProtect installed. To check this, see if you have the “globe” icon in the notification area (see screenshot below)

If you are unable to find the Globe, follow the instructions below to install it:
Install GlobalProtect Using Software Center/Company Portal
Note: You will need to be on campus to install GlobalProtect on your VIU computer. Once installed, you should be able to test if for functionality before leaving campus.
-
Click on Start. In the search box, type in “Software Center” without the quotes and if it does not show a "Best Match" app, please try typing "Company Portal"
-
Choose Software Center / Company Portal

-
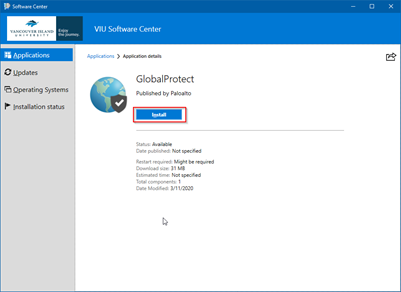
From the list of software, choose GlobalProtect
-
Click Install to install the GlobalProtect agent. If the only open is Uninstall, then it is already installed and you can continue to the "Using GlobalProtect VPN Agent (Windows/Mac)" section below.
- After several minutes the GlobalProtect agent will be installed
Personal Computer
-
-
Click on Download Windows 64 bit GlobalProtect agent to download the installer
-
Open the installer file (likely this will be in your Downloads folder)
-
Click Next

-
Click Next

-
Click Next

-
After the installation completes, click Close

Changes to Windows Login Page
After you install GlobalProtect and restart you may see a difference in your Windows Login Page depending on your version of Windows 10 & 11

If you are prompted to Sign-in to your computer using GlobalProtect, instead click on Sign-in Options.
Note: You cannot sign into a personal computer with your GlobalProtect credentials.

Please select the login method that you normally use to access your computer. (Pin or Password) Then log into your computer. In most cases, you will only be required to change the Sign-in option once.
Connecting to the VPN
-
Open the GlobalProtect agent by clicking on the “globe” icon in the notification area (see screenshots below)

-
If you are asked for the portal address, enter vpn.viu.ca and click Connect

-
Enter your VIU email address (e.g. jane.doe@viu.ca) and password. Then, click Connect.

Note: Your email address / username will be saved but your password will not. This must be entered each time you connect to the VPN.
-
You will then be asked to Verify Your Identity. This is VIU's 2-Step Verification policy asking you to complete the verification steps. Depending on how you chose to setup your 2SV, you will verify either via Microsoft Authenticator app or text message. More information on VIU's 2SV policy can be found here.
-
You should now be connected to the VPN.

Checking the Status of Your VPN Connection
-
To check the status of your VPN connection, click on the “globe” icon in the notification area (see screenshots below)

-
You should see the following screen if you are connected to the VPN:

-
You should see the following screen if you are disconnected from the VPN:

Disconnecting from the VPN
-
Click on the “globe” icon in the notification area (see screenshots below)
Windows:
-
Click Disconnect
